Introduction to Landguard Raised Beds
Creating a thriving garden requires the right environment for your plants to flourish, and landguard raised beds offer an innovative solution to meet these needs. By elevating your garden soil, these raised beds not only improve drainage but also enhance soil quality, making it easier for plants to absorb nutrients. Whether you’re a seasoned gardener or a beginner, understanding the utility and design of landguard raised beds can greatly enhance your gardening experience.
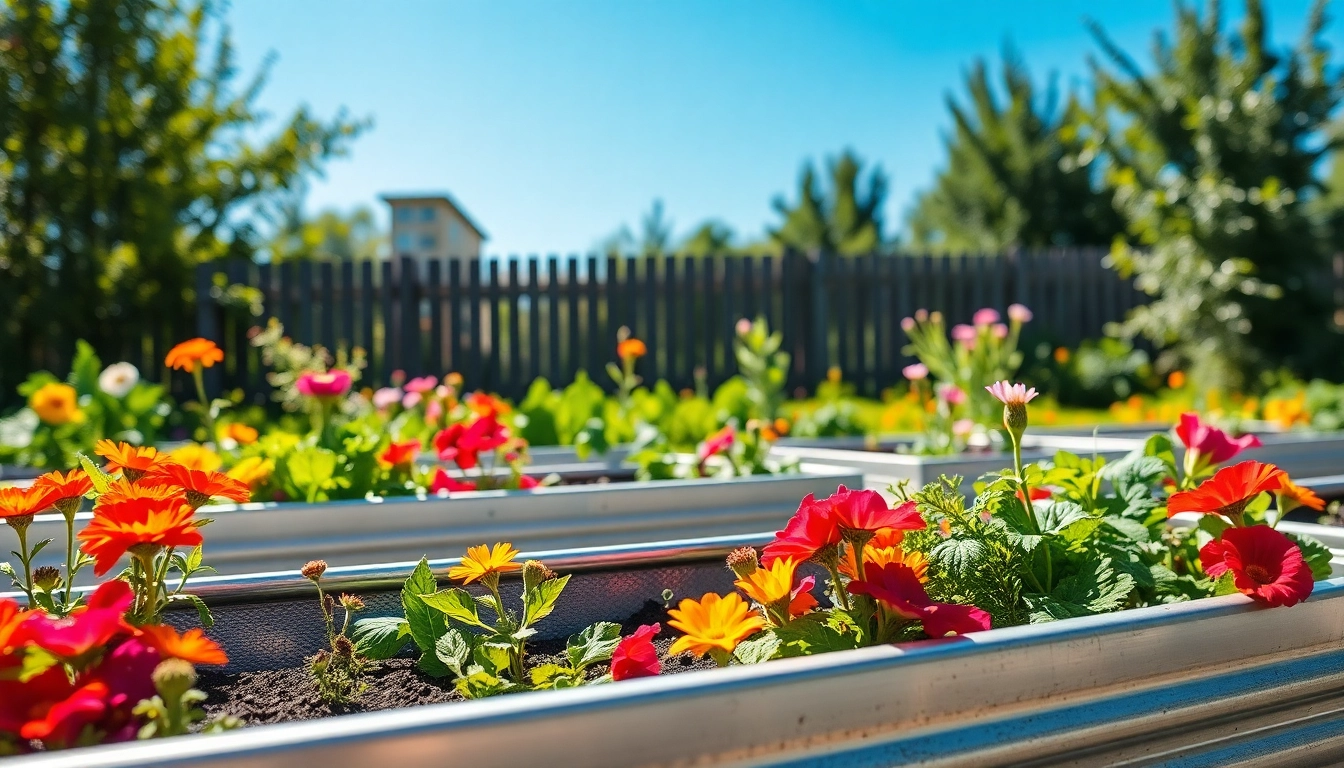
What Are Landguard Raised Beds?
Landguard raised beds are garden structures made from a variety of materials, including wood, composite, and galvanized metal. These beds are typically elevated from the ground and filled with soil, allowing for improved drainage and better control over soil quality. The design enables gardeners to customize the height, width, and length of their planting areas according to their specific needs, making them versatile for various gardening methods, including organic gardening and container gardening.
Benefits of Using Landguard Raised Beds
Utilizing landguard raised beds in your gardening routine comes with a multitude of benefits:
- Enhanced Soil Drainage: Raised beds allow excess water to drain away more easily, reducing the risk of root rot and other moisture-related problems.
- Improved Soil Quality: You have complete control over the soil composition, enabling you to create ideal conditions for your plants by mixing in organic matter, compost, and fertilizers.
- Extended Growing Season: Soil in raised beds warms up faster in the spring, allowing for earlier planting and a longer growing season.
- Reduced Physical Strain: With elevated planting areas, gardeners can work at a comfortable height, minimizing the physical strain associated with bending down to ground level.
- Pest Control: Heightened beds can deter certain pests and make it easier to implement pest control measures.
- Customization: Landguard’s extensive range allows for tailored solutions, from size and shape to material and color, fitting seamlessly within your landscaping.
Choosing the Right Size for Your Garden
Choosing the right size for your landguard raised beds is critical to maximizing your gardening success. Here are key factors to consider:
- Space Availability: Measure the area you intend to use for gardening. Larger beds can accommodate more plants but will require more maintenance.
- Plant Types: Different plants require varying amounts of space. For instance, root crops like carrots need deeper beds, while leafy greens can thrive in shallower ones.
- Accessibility: Consider how you will reach different parts of the bed. Aim for widths that allow you to reach the center from either side, typically around 4 feet wide.
- Future Expansion: If you plan to expand your garden in the future, consider starting with a modular design that allows for easy addition of more beds.
Installation Process for Landguard Raised Beds
Preparing the Ground
Proper ground preparation is crucial for the success of your landguard raised beds. Follow these steps:
- Select Location: Choose a site that receives at least 6-8 hours of sunlight per day and has good drainage. Avoid low spots where water may collect.
- Clear the Area: Remove any existing grass, weeds, or debris from the area designated for the raised beds.
- Level the Ground: To prevent uneven settling, ensure the ground is level or slightly sloped to promote drainage.
- Consider Ground Cover: Use landscape fabric or cardboard to suppress weeds and improve drainage beneath the beds.
Assembling Your Landguard Raised Beds
Once the ground is prepared, it’s time to assemble your landguard raised beds. Here’s a step-by-step guide:
- Gather Materials: Ensure you have all the necessary materials for assembly, including soil, wood or metal panels, corner brackets, bolts, and tools.
- Construct the Frame: Follow the manufacturer’s instructions to assemble the frame securely. Use metal corner brackets for additional strength if using wood.
- Install the Beds: Position the bed in the prepared area, ensuring it is level. Secure it if necessary to prevent shifting.
Ensuring Drainage and Soil Quality
A proper drainage system is crucial for the health of your plants. Consider the following aspects when ensuring adequate drainage and soil quality:
- Add a Drainage Layer: Place small stones or gravel at the bottom of the bed to promote drainage and prevent soil from washing away.
- Use Quality Soil Mix: Fill the bed with a high-quality mix comprising topsoil, compost, and organic matter to ensure nutritional balance.
- Test Soil pH: Regularly test the soil pH to maintain optimal levels for plant growth, typically between 6.0 and 7.0.
Planting Tips for Optimal Growth
Selecting the Right Plants for Landguard Raised Beds
Choosing the appropriate plants for your landguard raised beds is paramount. Here are some popular options:
- Vegetables: Beans, lettuce, tomatoes, and peppers thrive in raised bed conditions.
- Herbs: Basil, rosemary, and thyme are excellent choices that require less space and can thrive in compact areas.
- Flowers: Marigolds and nasturtiums not only beautify your garden but also attract beneficial pollinators.
Seasonal Planting Strategies
Understanding the best times to plant different species can significantly affect yield. Here are some strategies:
- Spring Planting: Start with cool-season crops such as peas and spinach as soon as the soil is workable.
- Summer Planting: Transition to warm-season crops like corn and beans as the weather warms.
- Fall Planting: Consider planting garlic and overwintering crops that can survive cold temperatures.
Complementary Plant Pairings
Companion planting can enhance growth and deter pests. Here are some ideal pairings:
- Tomatoes and Basil: Basil can enhance the flavor of tomatoes and repel pests.
- Carrots and Onions: Each helps deter pests that commonly affect the other.
- Beans and Corn: Beans can fix nitrogen in the soil, benefitting corn during its growth cycle.
Maintenance of Landguard Raised Beds
Watering Guidelines for Best Results
Maintaining proper hydration is critical. Here’s how to effectively water your raised beds:
- Establish a Schedule: Water deeply but infrequently. A good rule of thumb is to provide one inch of water per week.
- Monitor Soil Moisture: Check the top inch of soil for moisture before watering. If it feels dry, it’s time to water.
- Use Efficient Methods: Consider drip irrigation or soaker hoses to deliver consistent moisture directly to plant roots.
Pest Management Techniques
Managing pests organically can protect your plants without harmful chemicals. Here are effective strategies:
- Introduce Beneficial Insects: Ladybugs and lacewings can help control aphid populations.
- Apply Organic Pesticides: Use neem oil or insecticidal soap as natural pest deterrents.
- Practice Crop Rotation: Rotate crops each season to disrupt pest life cycles and reduce infestations.
Soil and Nutrient Management
Regular soil management ensures productive growth. Here’s how to keep your soil healthy:
- Add Organic Matter: Incorporate compost or well-rotted manure into the soil annually to replenish nutrients.
- Use Mulch: Spread organic mulch around plants to retain moisture, suppress weeds, and enhance soil quality as it breaks down.
- Monitor Nutrient Levels: Regularly test soil to determine nutrient levels and amend them as necessary for optimal growth.
Conclusion and Recommendations
Evaluating Your Gardening Success with Landguard Raised Beds
Assessment after planting is key to ongoing success. Keep track of which plants thrived, which struggled, and adjust your strategies accordingly. This kind of reflection can provide insights that enhance future gardening seasons.
Resource Guide for Further Learning
To continue learning about gardening and maximize the potential of your landguard raised beds, consider exploring:
- Gardening Books: Look for literature that covers organic gardening and soil health.
- Online Courses: Many platforms offer free or low-cost gardening courses that delve into specific aspects of gardening.
- Local Gardening Clubs: Join a community group where you can share experiences and gain tips from other gardeners.
Tips for Sharing Your Garden Journey
Document your gardening success with a journal or blog. Consider sharing progress photos on social media or discussions in gardening forums, which can foster a sense of community and encourage others to embrace gardening.